The first project is Basic Paint Application and the first exercise in this is entitled Getting to Know Your Brushes.
This opening exercise explores the range of marks and shapes that can be made by flat, round and filbert brushes. I began using acrylic paint. I used two sizes of brush for each type. All had synthetic hair and are cheap brushes. The paper was 160 gsm (acrylic) and 170 gsm (oils). The only reason for the difference was that I did not want to use oils directly into my sketchbook because they will take some days to dry fully. When the pages are dry, I will add them to the sketchbook.
Brush sizes used:
Flat – 8 & 16
Filbert – 10 & 18
Round – 3 & 10
The flat brush appears the most versatile so far, producing the greatest variety of marks, although this may be simply that the marks came to my inexperienced hand and eye the most readily. Surely other possibilities for all of these brushes, and other types, will come over time.
The flat brush offers broad and finer brush strokes; strokes that can fade with changes in applied pressure and as paint is exhausted. Fine lines, lines of variable thickness and stippling of various sizes and shapes are also possible. When two colours are applied in stippling, there is visible depth to the marks.
Obviously, brush size affects how much paint can be loaded at a time and also the size of the marks. Larger brushes produce more coverage and their strokes can convey more energy. Smaller brushes produce a more delicate range of marks and, while they can also be directional, tend to convey less energy (although this could be affected by altering the density of marks, too). To my eye, this occurs regardless of the type of brush.
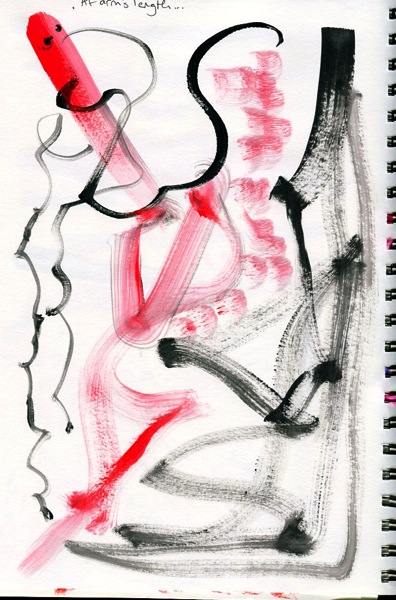
Where the brush is held – near the brush hairs or at the end of the handle – and whether control is achieved using the wrist or the shoulder affects the type of marks that can be made. Painting using the whole length of the arm, using the shoulder rather than the wrist produces looser marks due to less control. It also feels different – it requires more energy but also feels freer and can result in more intuitive, less controlled marks. Marks made holding the flat brush directly over the paper showed me that the brush I was using was old / cheap – the hairs lie to the sides and leave a hollow mark in the centre. I actually like the marks made – good for the surface of water, for example – but will need to buy a better large, flat brush for the times when I don’t want this effect…
The exercise was repeated using water-soluble oils with the same brushes. Oils are supposed to be used with stiffer brushes than I was using but I do not yet have specific oil brushes and also thought that using the same brushes for both paint types would give a fairer comparison of the characteristics of the paints.
The brush that I enjoyed using most was the filbert, even though its range of marks seemed more limited. I did not use the same sizes of brush so cannot make fair comparisons about how the brushes felt relative to each other. The brushes had also been used to different extents and, being relatively cheap, surely do not handle as well as their more expensive cousins, so a trip to the art supply store is in order.
Other brush types that were not used for this exercise but will be explored as I acquire a greater range of brushes include:
- Fan brushes
- Bright brushes (flat with short bristles)
- Egberts (elongated filberts)
- Mops
Here are the first pages of initial mark-making in acrylic paint using a flat brush (A4 Hahnemühle sketchbook):
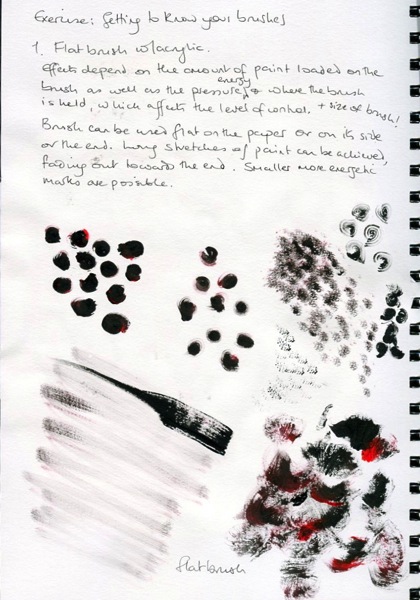
More flat brush marks – flowing, versatile brush – twists, straight lines equally possible. Can alternate the density of the marks, too.
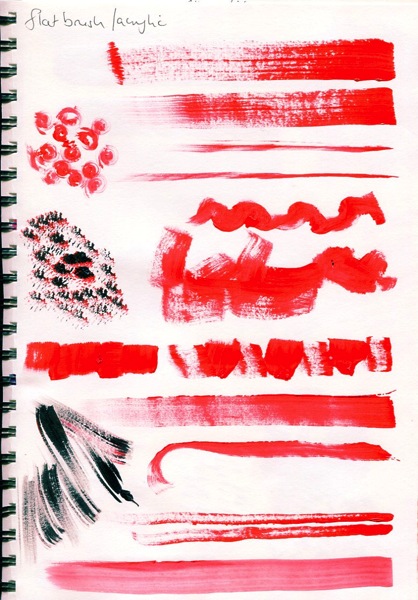
Using a filbert – my favourite so far. Lovely twisting, curly marks possible. Has a point for fine lines and other small marks.

More filbert marks and some with a round brush. I found the round brush the least versatile although I have found some variety in marks:

I also tried mark-making at arm’s length. This exercise felt different – I was much more emotionally-engaged with the process when standing. It was also easier to apply the brush vertically but not so easy from a shallow angle. I can see a seated future in the first page…

Here are the first pages of initial mark-making in water-soluble oils. I used a different paper for this exercise, slightly thicker (200 gsm) and a creamier colour. Hence the paper appears a bit dull compared with that used for the acrylics:
Using a flat brush:
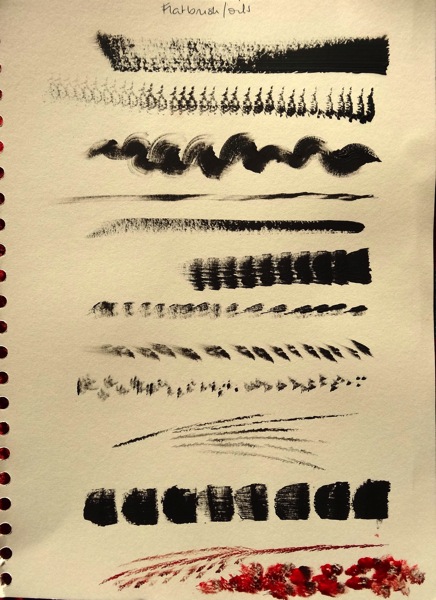
Using a filbert:

Using a round brush:

I liked the feel of the oil paint – smooth and buttery, not unlike acrylic and yet it created different possibilities for mark-making, which surprised me. However, I did not attempt to consciously replicate the marks made with acrylics.
Findings: the following can affect mark-making:
- The amount of paint on the brush
- How wet or dry the brush and/or paint.
- The pressure applied – affected by part of brush used; also constant vs variable.
- The energy used
- Where the brush is held
- The size of the brush
- The type of brush – shape; also type and length of bristles.
- The part of the brush used (tip, side, entire)
- The part of the arm that controls the brush.
Aside from the unique shape of a brush, these factors largely reduce to three things: amount of paint, pressure used and the extent of control.
The exercise felt stilted (I must make marks!), the reason being that there was no context other than to compare three brush types. Surely any brush will create unique, if similar, marks in different hands. More importantly, different contexts will elicit different types of mark depending on how we respond to a subject and whether we are trying to represent a visible surface of an object or a feeling. Therefore, the range must be infinite.
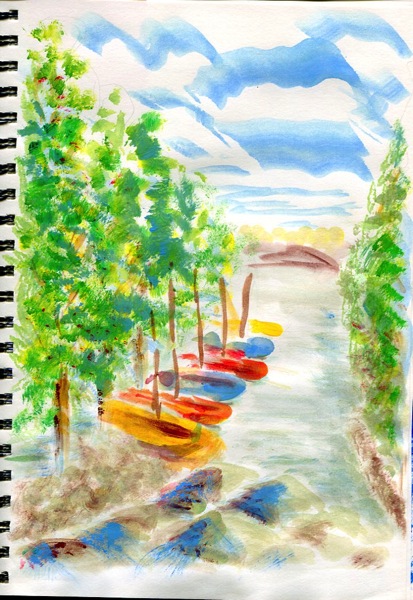
The next part of the exercise involved applying the marks to paint a simple landscape from memory and it was definitely more interesting applying paint in a context. This scene I had encountered beside the Rhine at Hersel, near Bonn, a few days earlier while on a bike ride. I am happy with the use of marks for the trees on the left and foreground rocks and, to a lesser extent, in the sky, where the clouds convey a slight sense of perspective, albeit without much realism. If the Rhine appears a bit narrow that is because the water here is in a channel separated from the main water course by an island (the Herseler Werth) on the right, which provides a natural, sheltered marina. The rocks are too prominent for realism but necessary for foreground interest. (Acrylic paint, A4 sketchbook)
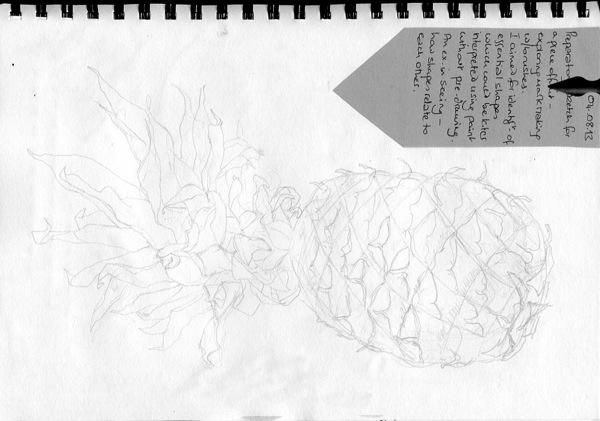
A more successful exercise in mark-making was painting a piece of fruit. I chose a pineapple for its combination of knobbly surface, which is characteristically a mix of ochre and greens, and the spiky blue-green foliage. I drew it first, in order to focus on the shapes and gain a sense of the types of marks that I would need to convey these shapes as well as the various textures of the fruit:
The pineapple became a little too round in the painting but I like the colours and it is recognisably a pineapple. The foliage should be a little darker where it is attached to the fruit. (Acrylic paint, A3 sketchbook).

I am also interested in using oil paints for this course. The course materials suggest that we have to specialise in one or the other medium and so I emailed my tutor to seek clarification. She replied: ” You can use whatever you want, in fact experimentation is very important! You might want to make notes about how each medium behaved, and whether the painting might have turned out differently or been easier in a different one. It’s all good!” I am greatly encouraged by this response because I would like to develop skills in the two media in parallel. I am put off traditional oils right now by the thought of turps in my workroom and so will work with Winsor & Newton’s water-soluble oil range. These paints are faster drying than I expected (a couple of days), although not fast enough for their use in a sketchbook if I need to use multiple pages within a day or two. Also, I have also not yet used them impasto, which will require longer drying times. Oils and acrylics have very different characteristics and behaviour on different surfaces, which offer the possibility of alternative interpretations.

Looking forward to seeing your posts for the Painting course. I’m still struggling with the Drawing course, but realise that until and unless I get through the second module ‘Colouring In Cabbages’ I can’t move on to the more interesting stuff like drawing buildings outside.
Thank you, John. The greengrocery in Drawing 1 is hard going but once you come through things definitely improve. That said, I think there could be a cauliflower or two lurking in the painting module, too…!